timeline
  August 2022 : Stable Diffusion v1.4
              : First open-source high-quality model
  September 2022 : Stable Diffusion v1.5
                  : Refined version
  October 2022 : eDiff-I (NVIDIA)
                : Ensemble approach
  November 2022 : Stable Diffusion v2.0/2.1
                : Higher resolution (768x768)
Module 4: Multimedia and Multimodal Models
Recap
- Described the fundamental concepts behind Agents/Agentic AI
- Explored and provided feedback on an existing multi-agent setup
- Understood available agent SDKs, how they differ, and advantages/disadvantages
- Used the OpenAI Agents SDK to build a multi-agent system, including document indexing and retrieval
- Understood and implemented tool calls using OpenAI’s function calling and via MCP
Lesson Objectives
- Understand the fundamentals and history of diffuser models
- Explore and use models that demonstrate text-to-image, image-to-image, inpainting, outpainting, and ControlNet
- Setup and use Replicate to create a custom pipeline of production-grade models
- Understand the fundamentals and history of Vision Encoders and VLMs
- Implement/test a local VLM model for on-device inference
Multimedia vs. Multimodal
Multimedia vs. Multimodal
- Multimedia models
- Single input/output models for images, video, audio, etc.
- Also known as computer vision, audio models
- Examples
- Text-to-Image (generate an image from a text prompt)
- Image-to-Image (generate an image from an existing image)
- Image-to-3D (generate a 3D object from an image)
Multimedia vs. Multimodal
- Multimodal models
- Process multiple datatypes such as text, images, and audio
- Also known as VLMs (Vision-Language Models) or ALMs (Audio-Language Models)
- Examples
- Image-Text-to-Text (ask a question about this image)
- Image-Text-to-Image (decompose this image into multiple layers)
- Audio-Text-to-Text (what is this sound?)
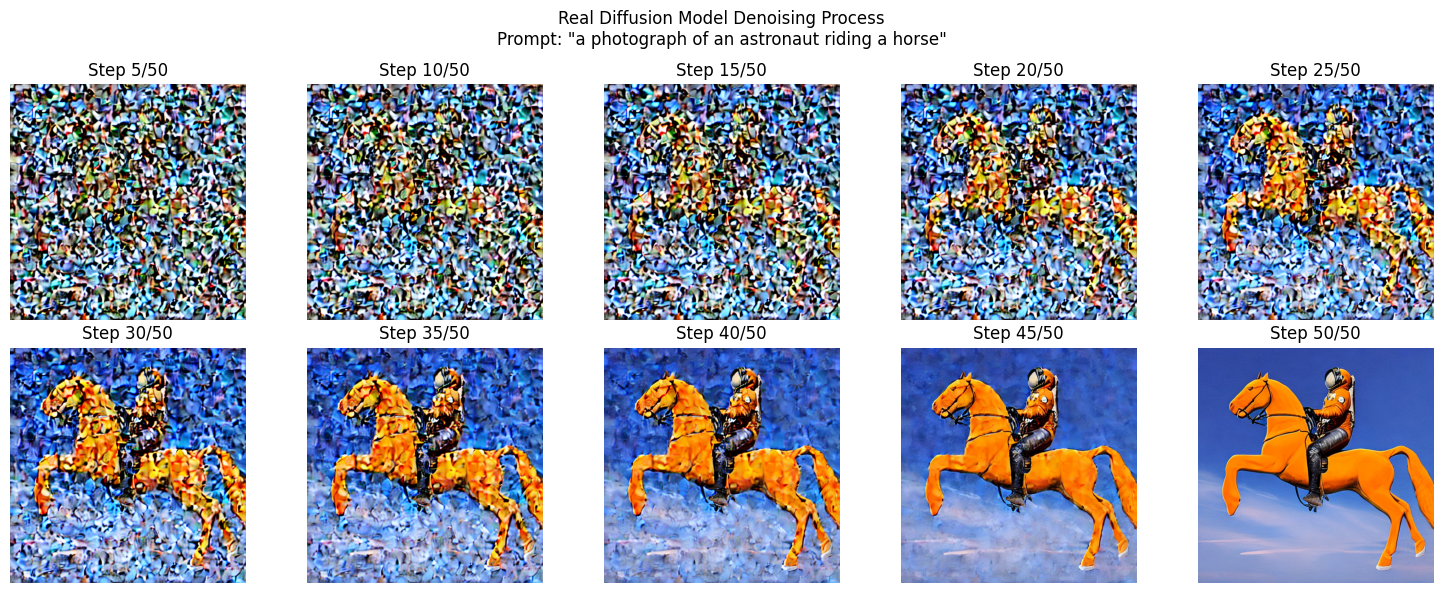
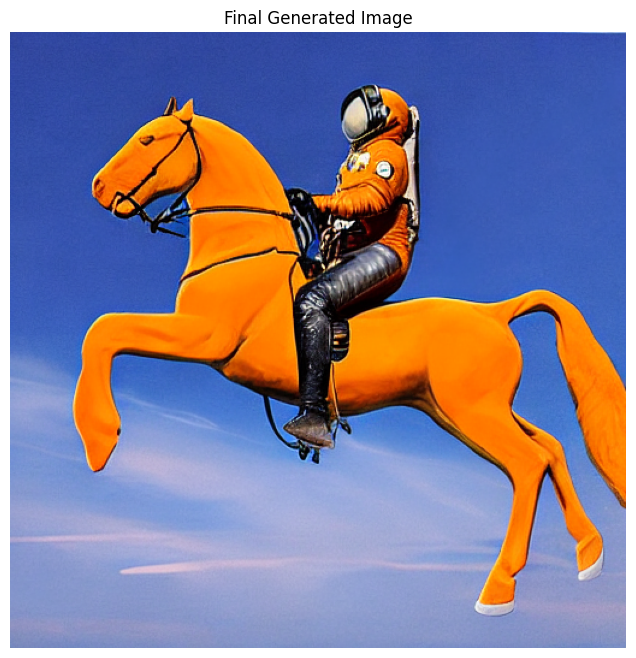
Text-to-Image
“A photograph of an astronaut riding a horse.”
- Based on a concept called a diffusion transformer
- Commonly known as a diffuser
- Two stage process, inspired by thermodynamics

Introducing the Diffuser
- Training
- During training, random noise is added to images in steps
- Model learns to predict what noise was added (forward diffusion process)
- Inference (process runs in reverse)
- Start with pure random noise
- Model estimates what noise should be removed to create a realistic image
- Using the text prompt, the model steers the process towards images that match the description
Image Diffusion Models in 2022
Image Diffusion Models in 2023
timeline
  March 2023 : Midjourney v5
              : Exceptional artistic quality
  April 2023 : ControlNet
        : Precise spatial control
        : AnimateDiff - Video generation
  July 2023 : SDXL (Stable Diffusion XL)
            : 1024x1024 native resolution
  August 2023 : SDXL Turbo
              : Real-time capable generation
Image Diffusion Models in 2024
timeline
  February 2024 : Stable Diffusion 3
                : Improved text understanding
  June 2024 : Stable Diffusion 3.5
            : Multiple model sizes
  2024 : FLUX.1 (Black Forest Labs)
        : State-of-the-art open model
        : Imagen 3 (Google DeepMind)
        : Photorealistic quality
Image Diffusion Models in 2025
timeline
  May 2025 : Imagen 4 (Google DeepMind)
           : Improved text rendering, 2K resolution
  August 2025 : Nano Banana (Google)
              : Autoregressive model in Gemini 2.5 Flash
  November 2025 : FLUX.2 (Black Forest Labs)
                : 32B parameters, multi-image references
Text-to-Image
Text-to-Image with SD 1.5
import torch
from diffusers import StableDiffusionPipeline

# Load a small diffusion model
model_id = "stable-diffusion-v1-5/stable-diffusion-v1-5"
pipe = StableDiffusionPipeline.from_pretrained(
    model_id,
)

# Move to GPU if available
device = "cuda" if torch.cuda.is_available() else "cpu"
pipe = pipe.to(device)
Text-to-Image with SD 1.5
import matplotlib.pyplot as plt
import numpy as np

PROMPT = "a photograph of an astronaut riding a horse" #@param {type:"string"}
STEPS = 50 #@param {type:"slider", min:10, max:100, step:1}
SEED = -1 #@param {type:"integer"}

intermediate_images = []

def callback_fn(step, timestep, latents):
    """Capture intermediate denoising steps"""
    # Decode latents to image every few steps
    if step % 5 == 0 or step == 0:
        with torch.no_grad():
            # Decode the latent representation to an image
            image = pipe.vae.decode(latents / pipe.vae.config.scaling_factor, return_dict=False)[0]
            image = pipe.image_processor.postprocess(image, output_type="pil")[0]
            intermediate_images.append((step, image))

result = pipe(
    PROMPT,
    num_inference_steps=STEPS,
    callback=callback_fn,
    callback_steps=1,
    generator=torch.Generator().manual_seed(SEED) if SEED != -1 else None,
).images[0]

# Visualize the denoising process
num_steps_to_show = min(10, len(intermediate_images))
step_indices = np.linspace(0, len(intermediate_images)-1, num_steps_to_show, dtype=int)

fig, axes = plt.subplots(2, 5, figsize=(15, 6))
fig.suptitle(f'Real Diffusion Model Denoising Process\nPrompt: "{PROMPT}"')

for idx, step_idx in enumerate(step_indices):
    row = idx // 5
    col = idx % 5
    step_num, img = intermediate_images[step_idx]

    axes[row, col].imshow(img)
    axes[row, col].axis('off')
    axes[row, col].set_title(f'Step {step_num}/{STEPS}')

plt.tight_layout()
plt.savefig('diffusion_process.png', dpi=150, bbox_inches='tight')
plt.show()
Text-to-Image with SD 1.5
Text-to-Image with SD 1.5
Sidebar: What are these pipelines?
- Our use of HF Transformers use so far
- Convert text to input tokens, pass to model, decode output tokens to text
- HF Pipelines provides a layer of abstraction
- (Setup the pipeline, then call
pipemethod) - While still giving access to underlying components
- (Setup the pipeline, then call
- Pipelines also standardize other areas
- e.g.,
pipe(prompt).images[0]works for all model types .to("cuda")moves all components of the model to the GPU
- e.g.,
Sidebar: Seeds
- What is a seed?
- (Optional) Integer value used to initialize the image generation
- Used to generate the initial random noise
- Using the same seed will generate the same image
- Why use a seed?
- Controlling the seed allows you to then experiment with different prompts or parameters
- Gives you more control/predictability vs. starting from random seed every time
Image-to-Image
Image-to-Image
- Image-to-Image: “Make this image different”
- Originally solved by GAN approaches, but evolved into extension of the diffuser concept
- Add noise to the original image (partial denoising)
- Regenerate it with modifications based on the prompt
- Strength parameter (0.0 - 1.0) to indicate the weight to the new image vs. original
- The original image heavily influences the output structure
Image-to-Image (Generate)
Image-to-Image (Original)
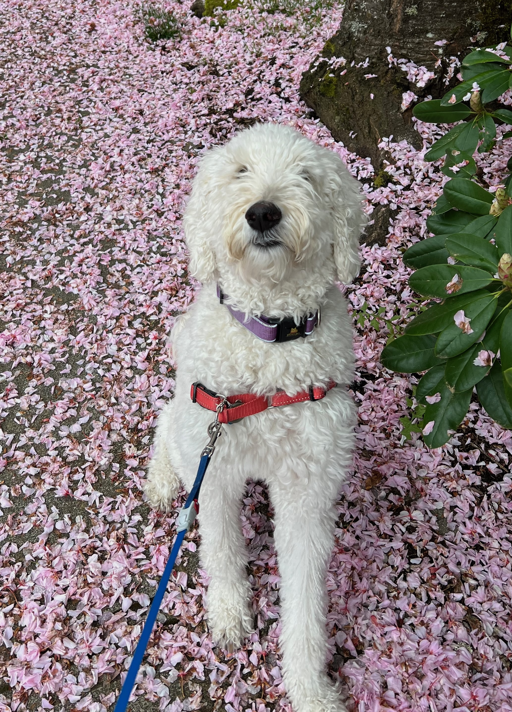
Image-to-Image (Original)
Prompt: “a goldendoodle wearing sunglasses, high quality, detailed”
Image-to-Image (Original)
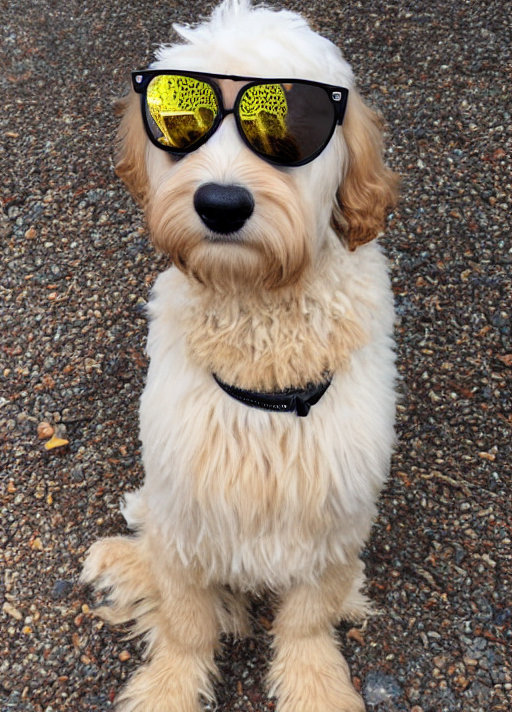
Image-to-Image (0.3)
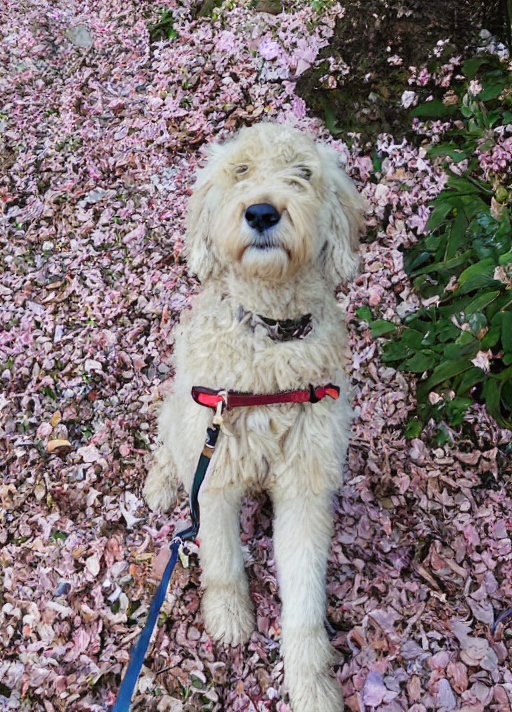
Image-to-Image (0.5)
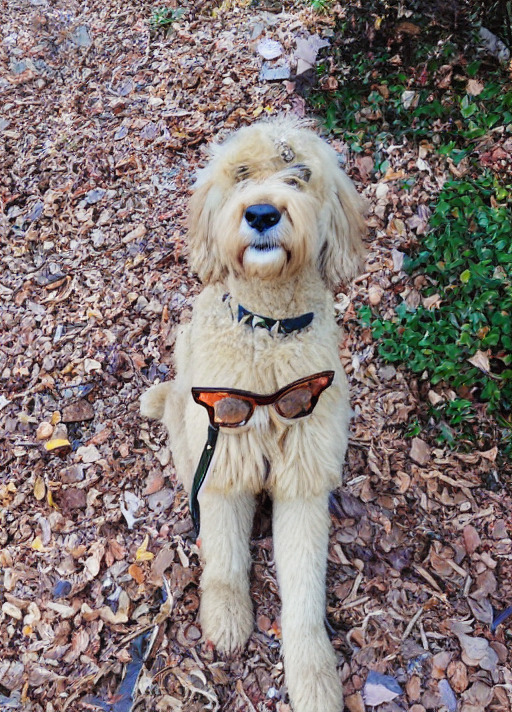
Image-to-Image (0.7)
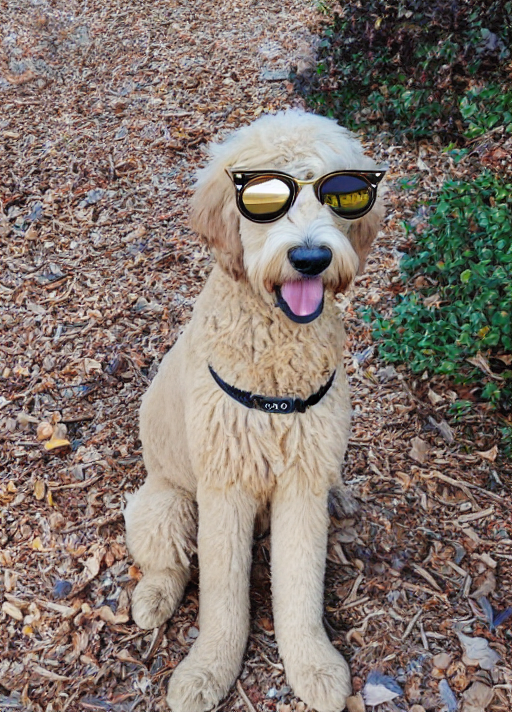
Image-to-Image (0.9)
Hands-on
Explore Text-to-Image and Image-to-Image notebooks (text-to-image-sd-1.5.ipynb and image-to-image-sd-1.5.ipynb)
Test different prompts, images, seed values, and steps.
Beyond SD 1.5
Beyond SD 1.5
- Stable Diffusion 1.5
- Great for learning about the diffusion process
- But the image quality isn’t great!
- Image models get large quickly
- Higher resolutions demand more GPU/VRAM
Introducing Replicate
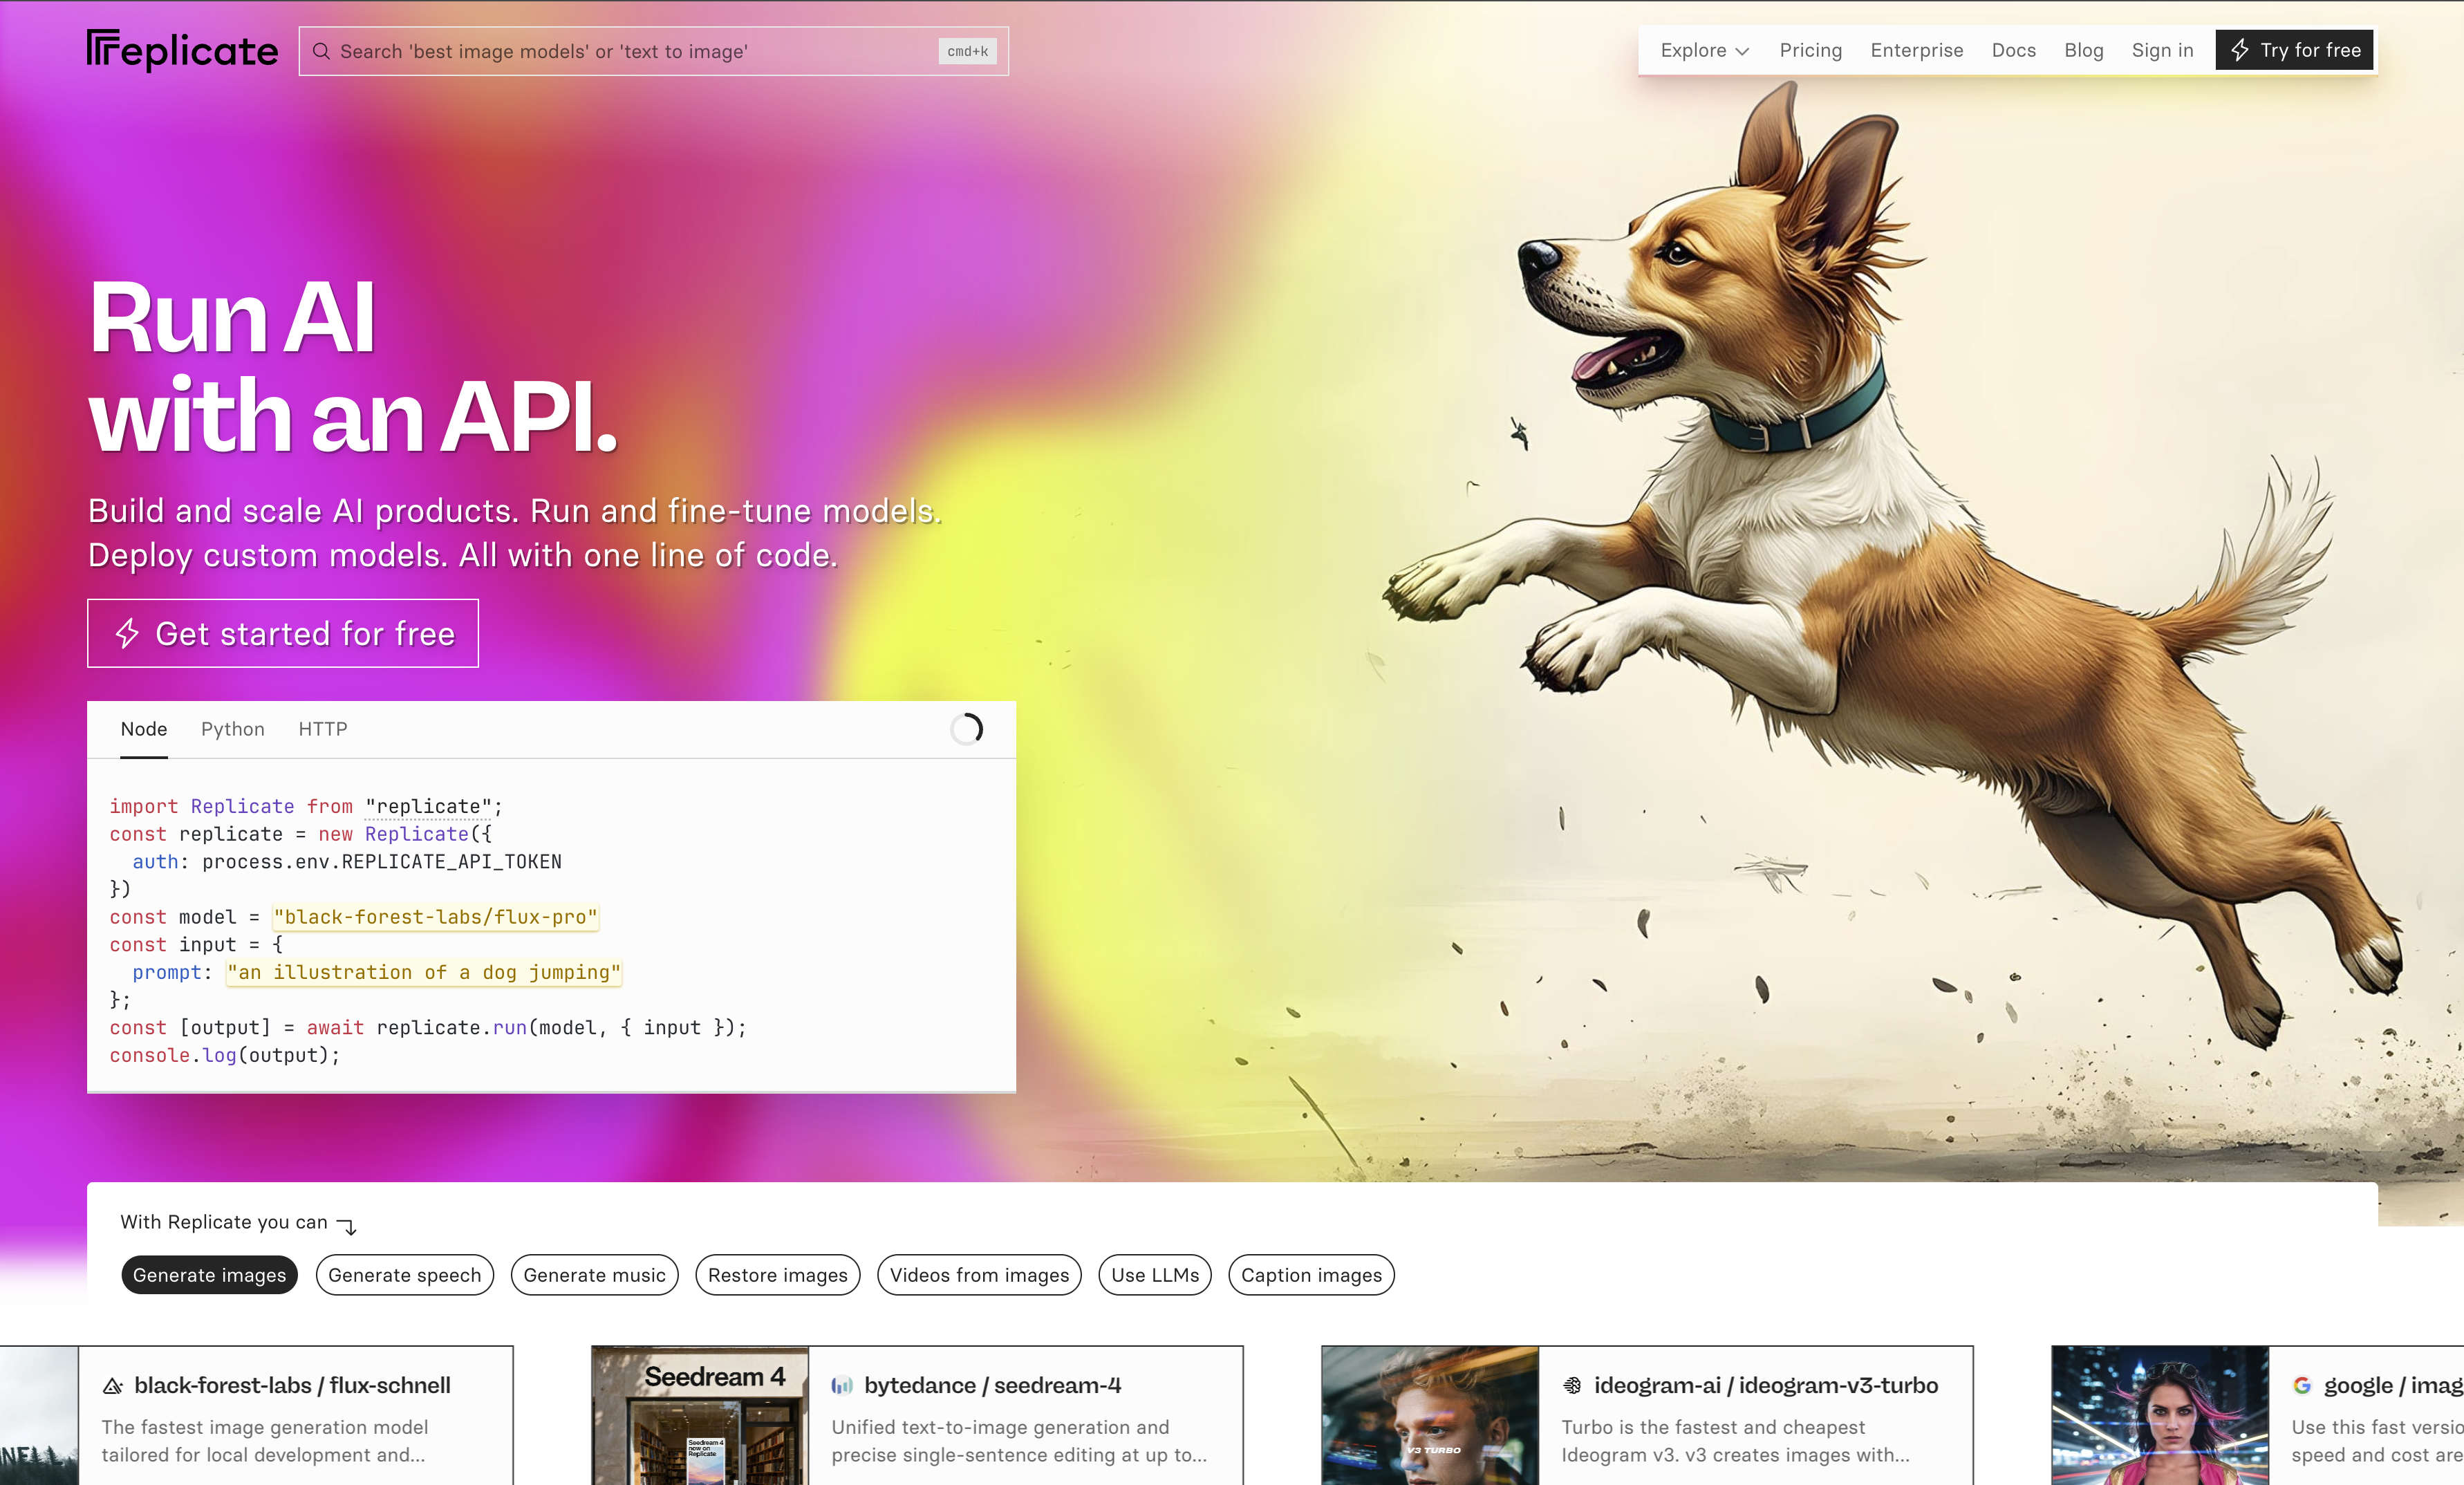
Source: https://replicate.com
Introducing Replicate
- Similar to OpenRouter
- But with a focus on image and video models
- Extensive access to larger models (e.g., FLUX 2, Nano Banana, ImageGen)
- Pay-per-call pricing (expect 2c per image for higher quality models; some free models)
- API access (with Python and NodeJS library)
- Fine-tune and share your own models
FLUX Models
- From Black Forest Labs (founded by ex-Stability AI researchers)
- Key architectural differences from Stable Diffusion:
- Uses a Multimodal Diffusion Transformer (MMDiT) instead of U-Net
- Processes text and image tokens together in a unified transformer
- Native support for higher resolutions without quality degradation
- Variants: FLUX.1 [schnell] (fast), [dev] (quality), [pro] (commercial)
Demo
Browsing models on Replicate
Using the Replicate API
Using the Replicate API
import replicate
output = replicate.run(
"black-forest-labs/flux-pro",
input={
"steps": 28,
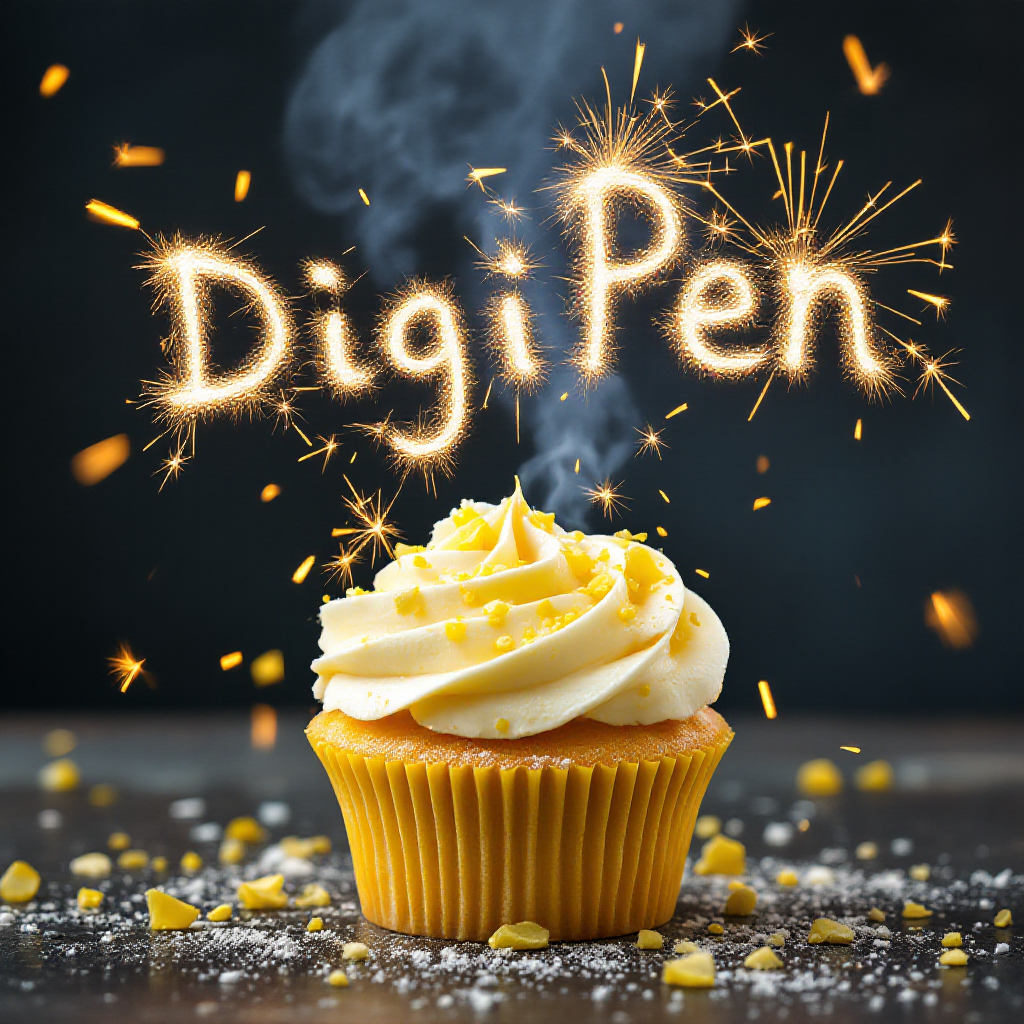
"prompt": "lemon cupcake spelling out the words 'DigiPen' with sparklers, tasty, food photography, dynamic shot",
"seed": 1564435,
"output_format": "png",
"safety_tolerance": 2,
"prompt_upsampling": False
},
)Using the Replicate API
- steps: Number to steps to run through
- seed: Random seed value
- prompt: Prompt to use to guide the model
- output_format: Output format to return
- safety_tolerance: Safety tolerance (1 is most strict; 6 is most permissive)
- prompt_upsampling: Run the prompt through an LLM to be more descriptive/creative
Using the Replicate API
Sidebar: Safety Tolerance
- How does safety tolerance work?
- Safety/guardrails are not typically embedded into the model
- e.g., SD 1.5 will generate NSFW images easily
- Instead, separate classifiers run alongside the model
- Input filtering: Analyzes the prompt prior to generation
- Output filtering: Image classifier examines the model before showing it to the user
- Thresholds used to control the classifiers
Image-to-Image
- Can also be used for…
- Super resolution (increase the resolution of this image)
- Style transfer (recreate this image in the style of…)
- Colorization (grayscale to color)
- Depth maps
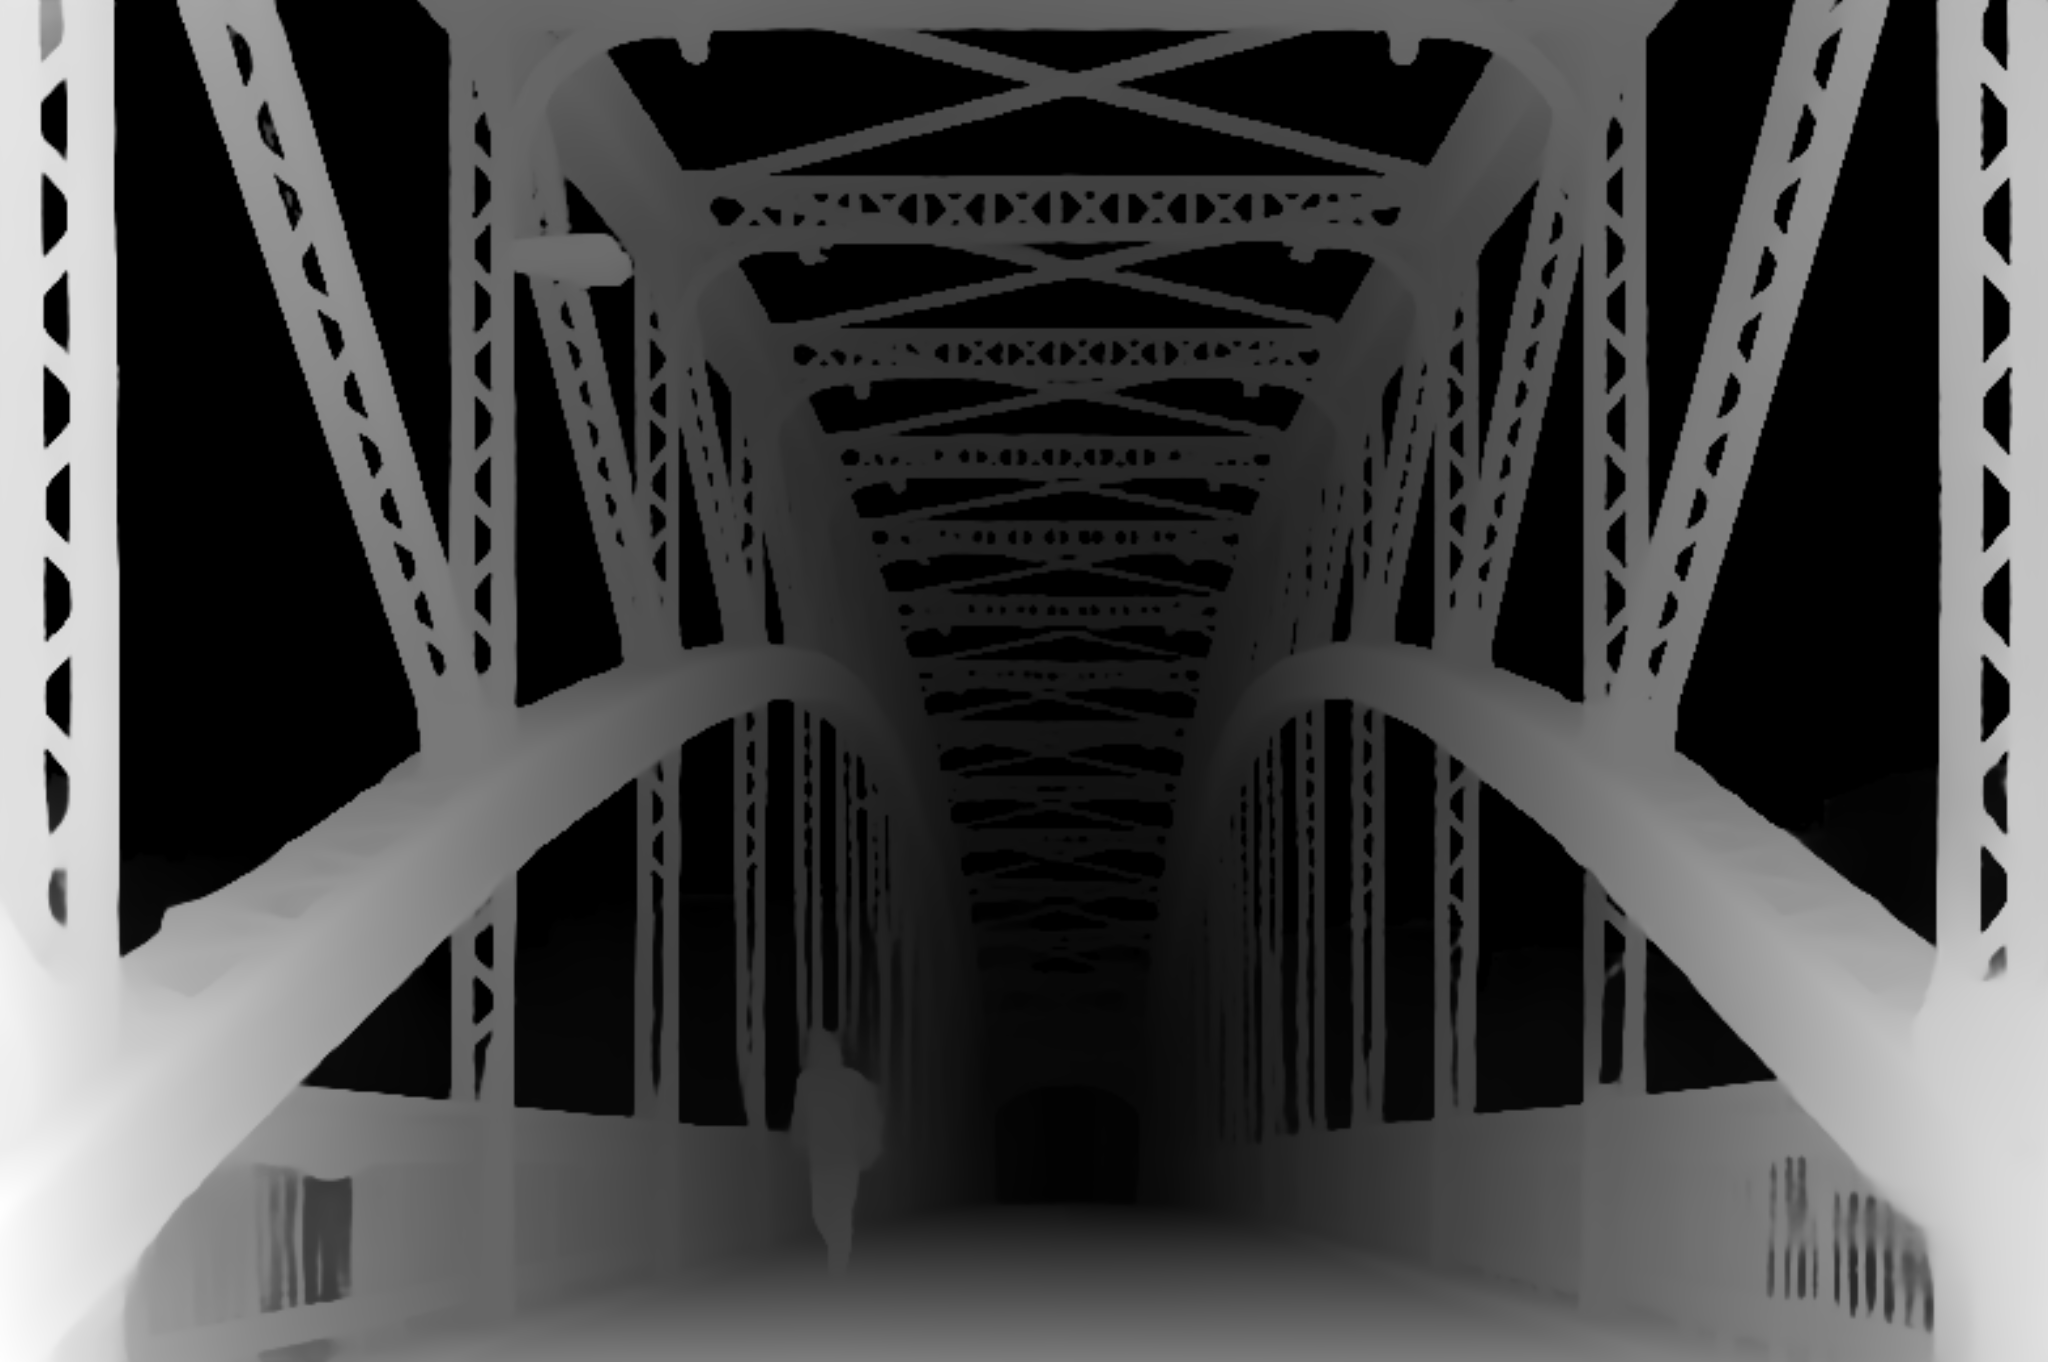
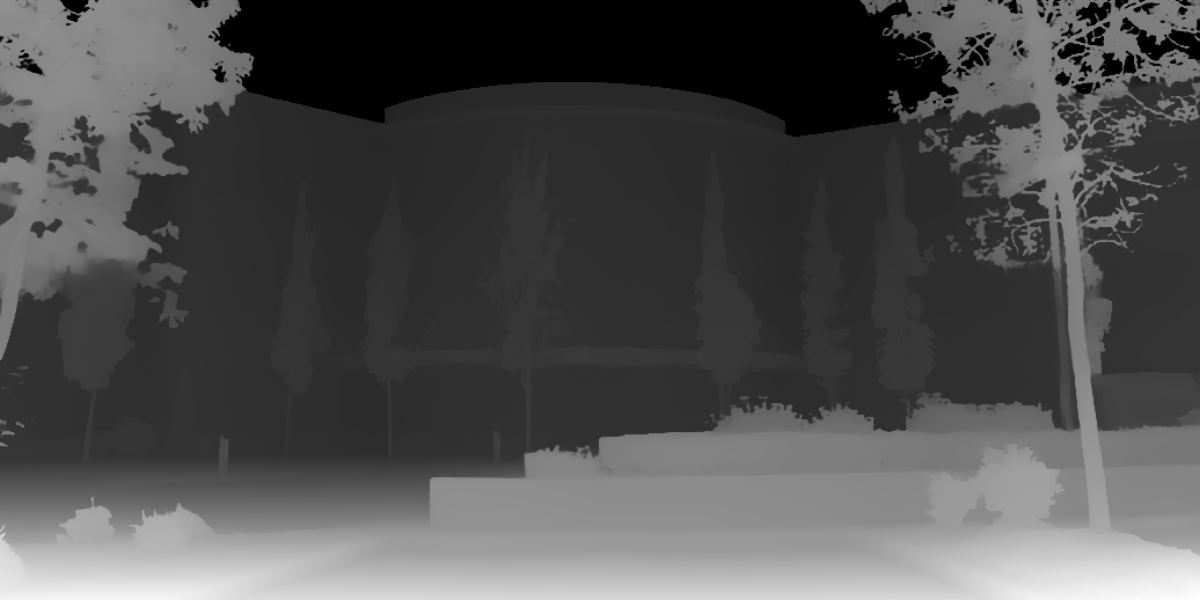
Depth Maps
- Images (often greyscale) where each pixel’s value represents the distance from the viewer
- i.e., objects in the foreground are lighter, background are darker
Depth Maps
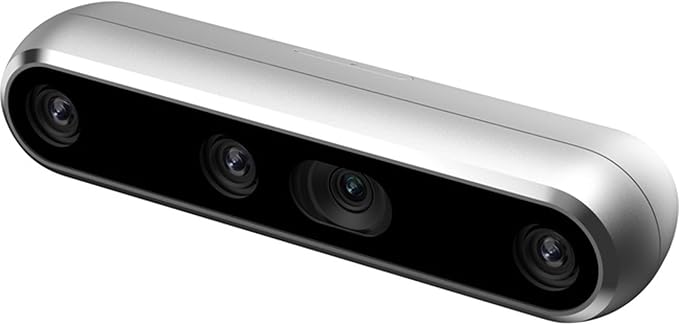
- Historically, required custom hardware
- Depth Camera (e.g., RealSense) - ~$300-500
- Module/processing for realtime (60fps) sensing
Depth Maps
- Image-to-Image depth estimation models
- Depth Anything, MiDaS, ZoeDepth
- Low latency (MiDaS 3.1 @ 20fps on embedded GPU)
- Used for
- 3D effects/estimation
- Simple/low-cost robotics
- Control input for other images
Depth Maps
Depth Maps
Depth Maps

Depth Maps
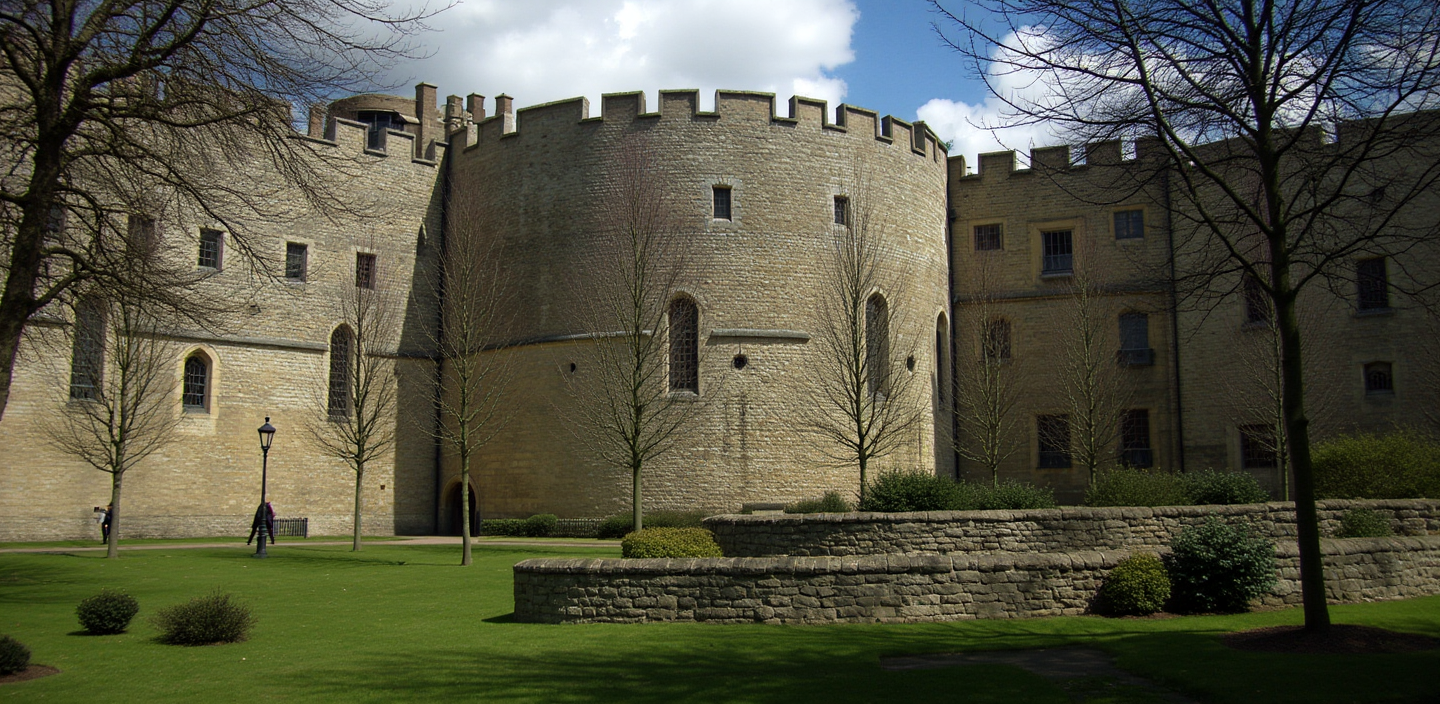
- Why do this?
- Depth map can be used as control image for new image
Depth Map as Control
Depth Map as Control
Depth Map as Control
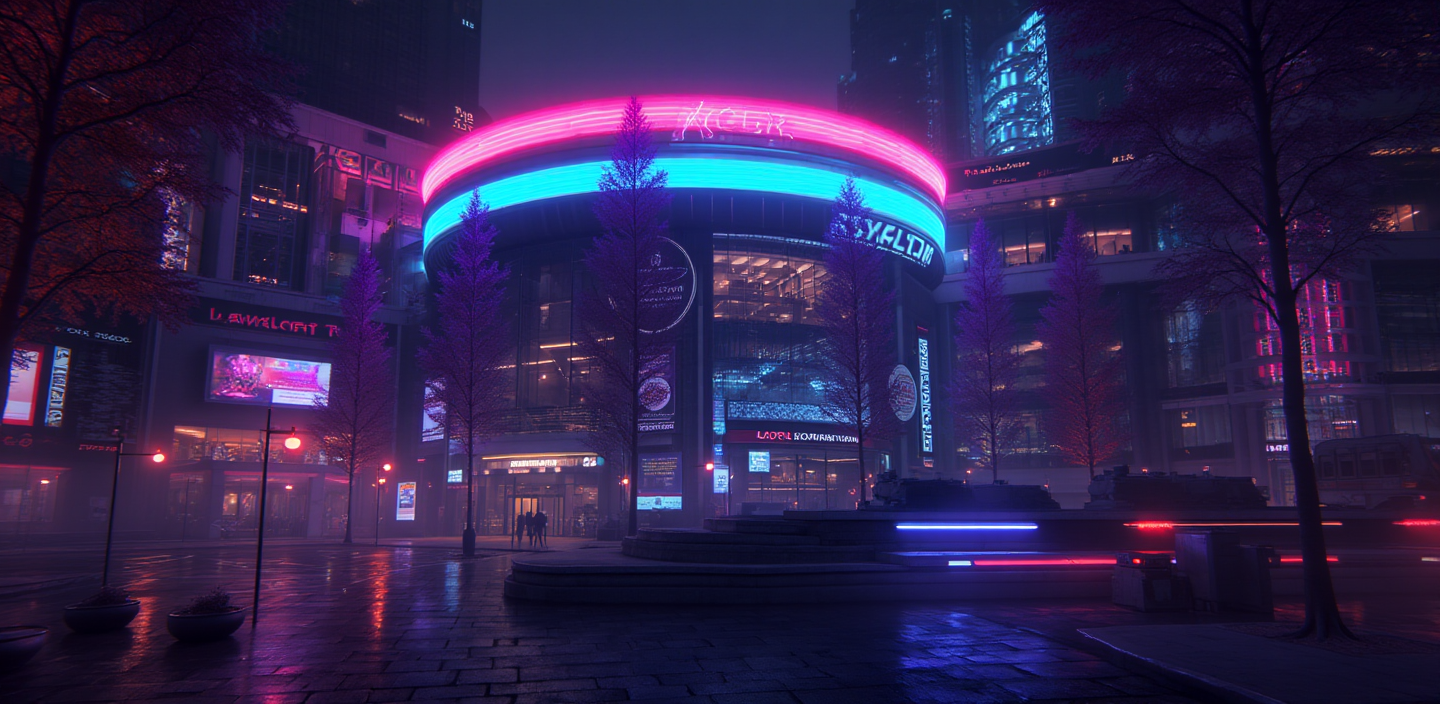
Depth Map as Control
Depth Map as Control
Inpainting
- Filling in missing or masked regions of an image in a realistic way
- Model is given an image with certain areas masked out
- Generates plausible content to fill those areas based on the surrounding context (and steered by a text prompt)
Inpainting
- Can be challenging
- Model needs to understand context around the area
- Generate content that matches the style, lighting, and perspective
- Follow a text prompt that was likely different from the original
Inpainting
import gradio as gr
import numpy as np
from PIL import Image
import replicate
import io

def inpaint(image_data, prompt):
    if image_data is None:
        return None

    # Get the original image from the background
    original_image = Image.fromarray(image_data['background'])

    # Get the mask from the layers
    if image_data['layers'] and len(image_data['layers']) > 0:
        mask_layer = image_data['layers'][0]
        mask_array = np.array(mask_layer)

        # Create binary mask: white where painted, black where not
        alpha_channel = mask_array[:, :, 3]
        binary_mask = np.where(alpha_channel > 0, 255, 0).astype(np.uint8)
        mask_image = Image.fromarray(binary_mask, mode='L')
    else:
        return None

    # Convert images to bytes for the replicate API
    image_bytes = io.BytesIO()
    original_image.save(image_bytes, format='PNG')
    image_bytes.seek(0)

    mask_bytes = io.BytesIO()
    mask_image.save(mask_bytes, format='PNG')
    mask_bytes.seek(0)

    # Call the Replicate API
    output = replicate.run(
        "black-forest-labs/flux-fill-pro",
        input={
            "image": image_bytes,
            "mask": mask_bytes,
            "prompt": prompt,
            "steps": 25,
            "guidance": 75,
            "outpaint": "None",
            "output_format": "jpg",
            "safety_tolerance": 2,
            "prompt_upsampling": False
        }
    )

    # Read the FileOutput and convert to PIL Image
    output_bytes = output.read()
    output_image = Image.open(io.BytesIO(output_bytes))

    return output_image

demo = gr.Interface(
    fn=inpaint,
    inputs=[
        gr.ImageEditor(
            label="Image (paint over areas to inpaint)",
            brush=gr.Brush(color_mode="fixed", colors=["#000000"]),
            layers=True
        ),
        gr.Textbox(label="Prompt", placeholder="Describe what should replace the masked area...")
    ],
    outputs=gr.Image(label="Output Image"),
    title="Inpainting using black-forest-labs/flux-fill-pro"
)
demo.launch(debug=True)
Demo
Inpainting using Gradio and Replicate: inpainting.ipynb
Outpainting
- The opposite of inpainting, kind of :)
- How does it work?
- Supply a prompt: “2x zoom out this image”
- Treat the new empty regions around the image as masked areas
- Use inpainting technique to fill in the regions
Outpainting
- More challenging
- Less context at the edges of the image vs. center/surrounded
- Need to maintain the style, lighting, and perspective
- Has to be creative. Can’t just be a repetitive pattern.
Outpainting
Outpainting
import replicate
# Call the Replicate API
output = replicate.run(
"black-forest-labs/flux-fill-pro",
input={
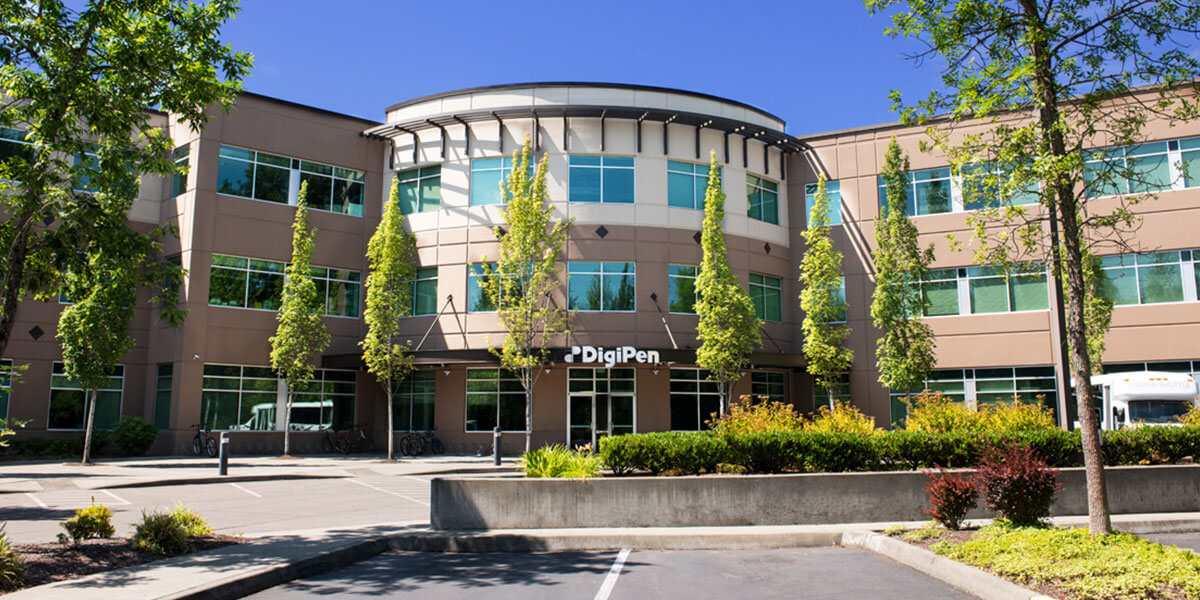
"image": INPUT_IMAGE,
"prompt": "The main building of a technical college, no text",
"seed": 123456,
"steps": 50,
"guidance": 60,
"outpaint": "Zoom out 2x",
"output_format": "jpg",
"safety_tolerance": 2,
"prompt_upsampling": False
}
)Outpainting
Outpainting

Inpainting and Outpainting
- Popular models
- Stable Diffusion (Many inpainting variants)
- Flux Fill from Black Forest Labs
- LaMa: Large Mask inpainting
- Ideogram
Hands on
Register for a Replicate account; create an API key
Text to Image using text-to-image-replicate.ipynb
https://replicate.com/collections/try-for-free
Inpainting and Outpainting using inpainting/outpainting.ipynb
I Want More Control!
I Want More Control!
- Prompt engineering for text-to-image and image-to-image is important
- Bad prompt:
a cat - Good prompt:
A fluffy orange tabby cat sitting on a wooden windowsill, golden hour lighting, soft focus background of a garden, photorealistic, highly detailed fur texture, warm color palette, shot with 85mm lens, shallow depth of field
- Bad prompt:
I Want More Control!
- Key components to include in prompts:
- Subject: What you want
- Style/Medium: photorealistic, oil painting, digital art
- Lighting: studio lighting, dramatic shadows, soft diffused
- Composition: close-up, wide-angle, rule of thirds
- Quality: highly detailed, 4K, sharp focus
- Technical specs: 85mm lens, f/1.8, bokeh
I Want More Control!
- Negative prompts (popular in some models)
- Tell the model what to avoid - particularly useful with Stable Diffusion
blurry, low quality, distorted, deformed, ugly, bad anatomy, extra limbs, watermark, text, signature, overexposed, underexposed, cartoon
I Want Even More Control!
- Extensive prompts (both positive and negative) can help, but only so far
- Ultimately, “hoping the model guesses what I mean”
- Fine-tuning possible, but it’s expensive and risks degrading quality (and potential overfitting)
- Need a different approach…
Introducing ControlNet
Introducing ControlNet
- Developed by Lvmin Zhang and Maneesh Agrawala at Stanford University
- Published in February 2023 (Zhang, Rao, and Agrawala 2023)
- ControlNet represented a paradigm shift from “describe what you want” to “show the structure you want”.
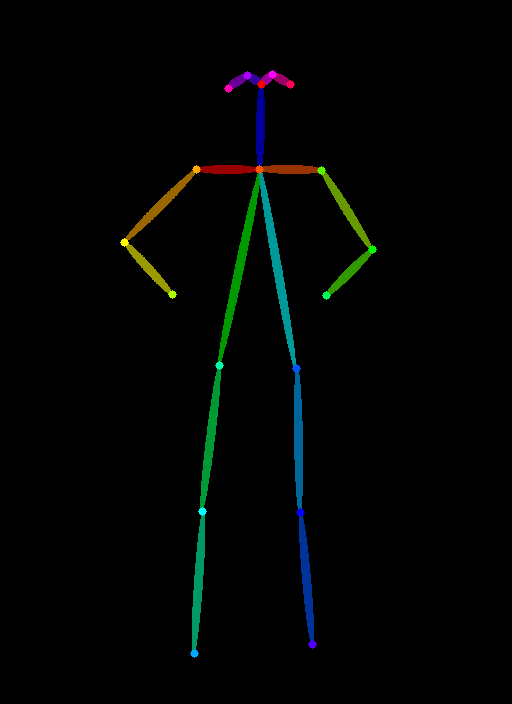
How ControlNet Works
- Stable Diffusion’s U-Net has an encoder and decoder
- Create a trainable copy of the encoder blocks
- Train the copy of the encoder alongside the frozen SD model
- During training: use paired data (e.g., pose skeleton → original image)
- During inference: both encoders run together
- Features from both are combined via zero convolutions
- Key: The weights in the original SD model don’t change
- ControlNet is analogous to a “Plug in” model
How ControlNet Works
Examples of conditioning types:
- Depth maps: 3D structure information
- Human pose: skeleton/keypoint detection
- Canny edges: line drawings and edge detection
- Scribbles: rough user drawings
- QR codes: blended into images
How ControlNet Works
How ControlNet Works
How ControlNet Works
How ControlNet Works
How ControlNet Works
How ControlNet Works
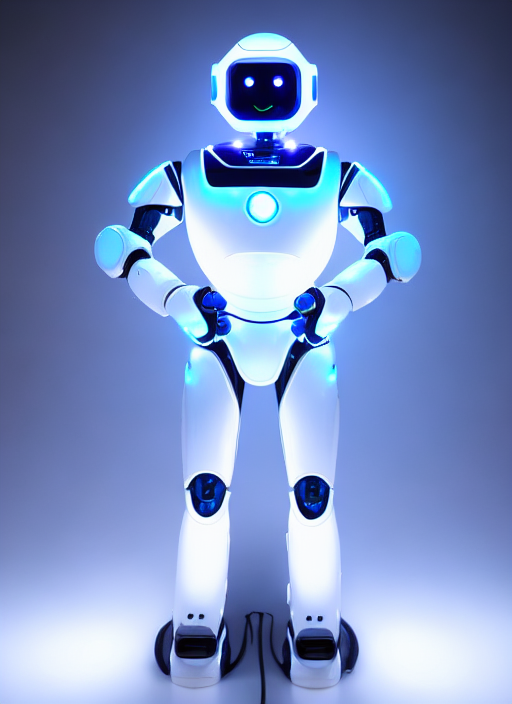
PROMPT = "a robot with glowing LED lights, futuristic, sci-fi"
NEGATIVE_PROMPT = "blurry, low quality, distorted, extra limbs, deformed"
SEED = 3434002

result = pipe(
    prompt=PROMPT,
    negative_prompt=NEGATIVE_PROMPT,
    image=pose_image,
    num_inference_steps=25,
    guidance_scale=7.5,
    controlnet_conditioning_scale=1.0,
    generator=torch.manual_seed(SEED) if SEED != -1 else None
).images[0]
display(result)
How ControlNet Works
How ControlNet Works
How ControlNet Works
Hands on
ControlNet (OpenPose) using controlnet-openpose-sd-1.5.ipynb
Demo: Putting this all together
Using text-to-image, ControlNet, inpainting, and image-to-image (depth map) to create PBR materials
pbr-creator.ipynb
Using Transformers for Computer Vision
CNNs to Vision Transformer
- Historically, computer vision has used classification models called CNNs (Convolutional Neural Networks)
- Enter the Vision Transformer (ViT)
- “An Image is Worth 16x16 Words: Transformers for Image Recognition at Scale” (Dosovitskiy et al. 2021)
- Tipping Point
- Initially, ViTs didn’t outperform CNNs
- But exceeded SOTA CNNs on larger datasets (such as Google’s JFT-300M)
Popular Vision Transformers
- OpenAI’s CLIP
- Trained on 400M image-text pairs
- Foundation of most VLMs
- Meta’s DINO/DINO-2
- (Self DIstillation with NO Labels)
- Self-supervised on 142M images
- Microsoft’s Swin
- Use “shifted windows” approach
- Excels at dense prediction tasks
Vision Language Models (VLMs)
- ViTs by themselves are only so useful
- Introducing VLMs (Vision Language Models)
- A vision encoder
- Adapter/projector layer
- Language model (LLaMa or GPT)
- Also known as “Multimodal”
- Image-Text-to-Text
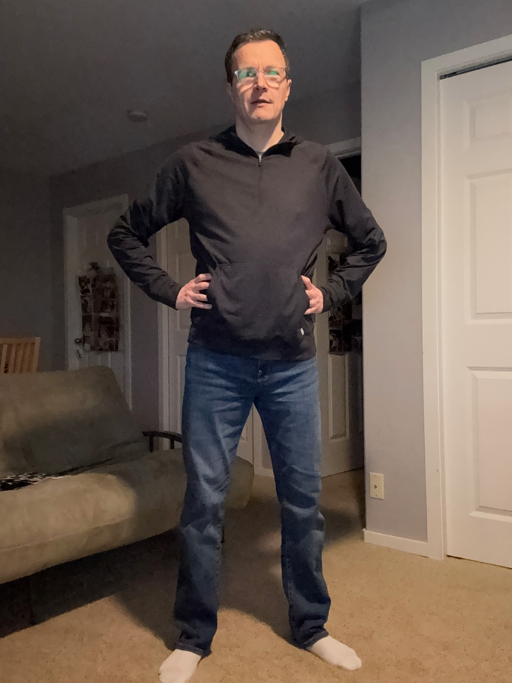
Demo
Using Gemma 3 (4B) to describe an image
Notebook: vlm-gemma-3-4b.ipynb
Sidebar: Image URL Dereferencing
Sidebar: Image URL Dereferencing
messages = [
    {
        "role": "system",
        "content": [{"type": "text", "text": "You are a helpful assistant."}],
    },
    {
        "role": "user",
        "content": [
            {"type": "image", "url": IMAGE_URL},
            {"type": "text", "text": "What animal is on the candy?"},
        ],
    },
]

output = pipe(text=messages, max_new_tokens=200)
print(output[0]["generated_text"][-1]["content"])
Sidebar: Image URL Dereferencing
- Handled within the pipeline library
- Detects the image URL in the message structure
- Downloads the image
- Loads as a PIL Image object
- Preprocessing (resizing, normalizing pixel values)
- Converts to tensors
Vision Language Models (VLMs)
- Text gets tokenized into token IDs
- Image gets processed into pixel tensors
- Both feed into their respective encoders (text encoder, vision encoder)
- Features are aligned via shared embedding space
- e.g., visual concepts (furry, four legs, whiskers, etc.) are close to the word “cat” in shared embedding space
Use Cases for VLMs
- Visual Understanding: “What’s in this image?”
- Accessibility: Assisting users with visual impairments
- Content Moderation and Safety: Identifying harmful content
- Retail: Finding products with photos
- Education: Helping students understand charts, diagrams, equations
- Robotics: Providing Robots with information to navigate their environment
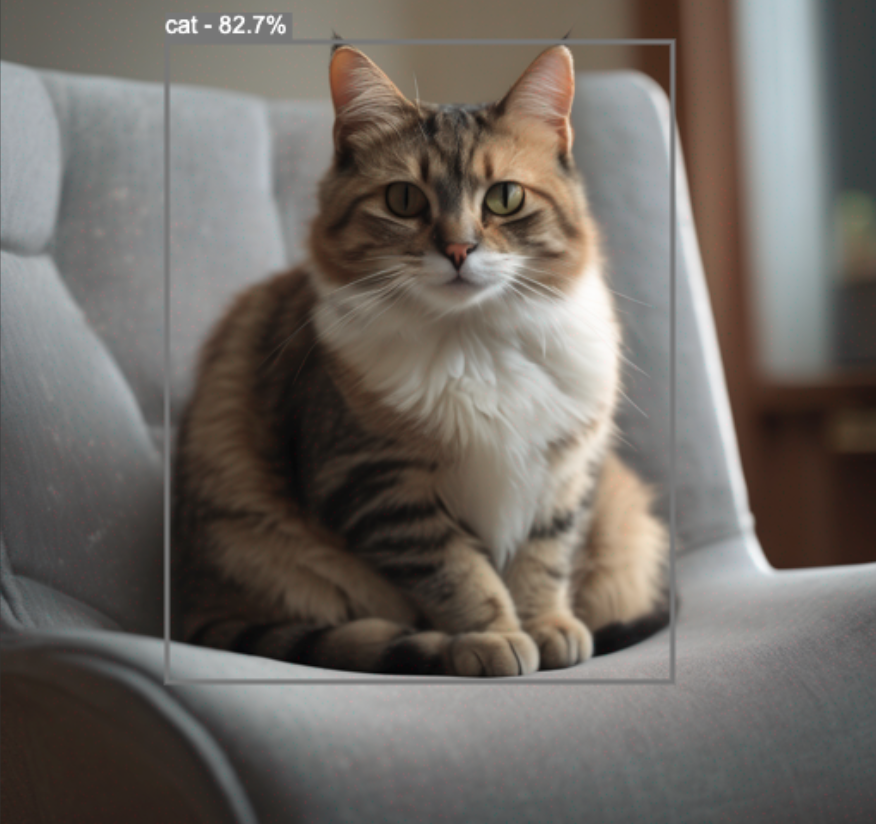
VLMs vs. Object Detection Models
- Richer semantics (e.g., tabby cat vs. cat)
- Contextual descriptions
- Zero-shot: Can identify objects never seen during training
- But less precise at localization (bounding boxes, pixel coordination)
Popular VLMs
- Closed Source
- GPT4-V, Claude, Gemini Flash
- Open Source
- LLaVa: Research collaboration between University of Wisconsin-Maddison and MSR
- Gemma: Google’s Gemma-3
- FastVLM: Apple’s Fast Vision Language Model
FastVLM
- Recent release from Apple (presented at CVPR 2025)
- Paper: FastVLM: Efficient Vision Encoding for Vision Language Models (Vasu et al. 2025)
- https://huggingface.co/apple/FastVLM-0.5B
- Small VLM, optimized for on-device, real-time performance
- Custom vision transformer: FastViTHD. Combines transformers and convolutional layers
Demo
Apple’s FastVLM
Looking Ahead
Looking Ahead
- This week’s assignment!
- No class next week (Founder’s Day). See you on Feb 13th!
- Deep dive on hardware/GPU architectures
- Running models on local hardware
- Quantization
References
References
Dosovitskiy, Alexey, Lucas Beyer, Alexander Kolesnikov, Dirk Weissenborn, Xiaohua Zhai, Thomas Unterthiner, Mostafa Dehghani, et al. 2021. “An Image Is Worth 16x16 Words: Transformers for Image Recognition at Scale.” arXiv Preprint arXiv:2010.11929.
Vasu, Pavan Kumar Anasosalu, Fartash Faghri, Chun-Liang Li, Cem Koc, Nate True, Albert Antony, Gokul Santhanam, et al. 2025. “FastVLM: Efficient Vision Encoding for Vision Language Models.” In Proceedings of the IEEE/CVF Conference on Computer Vision and Pattern Recognition (CVPR), 19769–80.
Zhang, Lvmin, Anyi Rao, and Maneesh Agrawala. 2023. “Adding Conditional Control to Text-to-Image Diffusion Models.” arXiv Preprint arXiv:2302.05543.